
By the Zoye Patio export & engineering team, Ningbo · Last reviewed August 2026
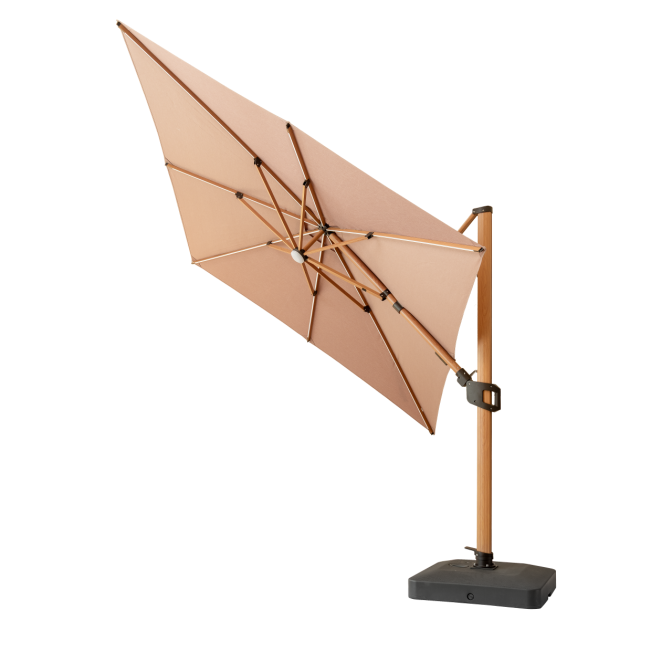
The Model 08 seen from below at an angle, canopy open. From here you can read the rib symmetry and hub geometry — the two things that decide whether canopy tension is even or lumpy.
Experienced buyers ask for a factory tour before a big order, and it's not sightseeing. It's because the defects that turn into warranty claims almost never show up at final inspection. They're born at a specific stage — usually alloy intake or welding — and by the time the umbrella is in its carton, the flaw is sealed inside and invisible.
You don't need to become a metallurgist to protect yourself from that. You just need to know the seven stages and the one question worth asking at each. So here's the walk-through, the way we'd give it if you were standing on our floor in Ningbo.
Stage 1 — Alloy intake and verification
Every commercial frame begins as incoming aluminium profile, and the first checkpoint is traceability. The heat number on the material test certificate should match the batch on the production order. If a supplier can't show that link, they're almost certainly buying off the spot market with no quality guarantee behind it.
We gauge wall thickness ultrasonically rather than trusting a caliper on a cut end, because the caliper misses internal voids. The quiet risk here: a 6063-T1 billet can be extruded into a profile that looks identical to T5, passes a visual check, even passes most dimensional checks — and then behaves nothing like T5 under three years of cyclic load. Intake is where you catch that or you don't.
Stage 2 — Extrusion and precision cutting
Profiles come pre-extruded and get cut to length on CNC saws. For a standard 3×3M unit:
Component |
Finished length |
Main post (ground to top collar) |
2,800–3,000 mm |
Cantilever arm (pivot to canopy edge) |
1,500–1,600 mm |
Rib blank (before bending) |
1,200–1,250 mm |
Ribs are then mandrel-bent on CNC to a parabolic curve — and this is a place where cheap and careful diverge. Hand-bending, still common at small shops, introduces variance that you'll read later as uneven fabric tension across panels, especially obvious after the first season of hot-cold cycling.
Stage 3 — Welding and joints
If I had to point at the single stage that decides structural failure, it's this one — and the failure won't appear for a year and a half. Three joints matter most:
Our locking collar design is part of the patent portfolio precisely because it spreads cantilever load over a wider contact area than a standard pin-and-slot joint. That's not a marketing line — it's the joint that fails on the frames we get asked to replace.
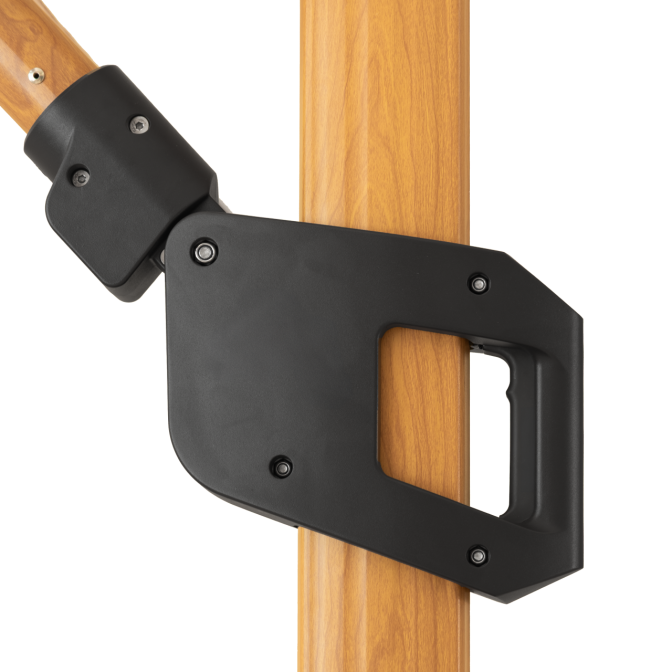
The arm locking bracket on the Model 08 — a cast body with a multi-bolt fixing and an open handle so it can be worked one-handed during angle adjustment.
Stage 4 — Surface treatment
Treatment |
Process |
Typical use |
Adds to lead time |
Standard powder coat |
Electrostatic spray + oven cure |
General commercial |
+1 day |
Anodising |
Sulphuric acid bath + seal |
Coastal / marine |
+2 days |
Mirror anodising |
Multi-stage polish + anodise |
Premium hospitality |
+3–4 days |
A small but real packing note: powder coat adds ~0.3 mm per surface, which matters for parts that nest together in the carton; anodising adds ≤0.02 mm and changes nothing about your container maths. (Article 7 puts numbers on what each finish adds to FOB.)
Stage 5 — Canopy cutting and sewing
Panels are plotter-cut to ±1 mm, one panel per rib. That tolerance sounds fussy until you do the arithmetic: a 2 mm error across twelve panels stacks to 24 mm of distortion at the hem, and that's exactly the buckling you see at a canopy edge under wind. Sewing that holds up commercially means double-lock stitch in UV-stabilised thread (50+2 tex minimum), bar-tack reinforcement at every rib-tip pocket, a 50 mm turned hem and a 120–180 mm valance.
Stage 6 — Assembly and 100% functional testing
Every unit is cycled before it's boxed — not a sample, every unit. Minimum 50 open/close cycles with no mechanism binding; tilt lock verified under a 5 kg canopy load; and for LED models, the circuit runs at 12 V DC for ten continuous minutes to catch cold-solder joints.
Stage 7 — Packing for export
Commercial 3×3M units ship in double-wall corrugated cartons (5-ply or better) with foam at every frame protrusion. A 20GP holds roughly 40–50 units depending on base type. For a first order, ask for a packing list with carton dimensions, gross weight and packages-per-unit — it lets you reconcile what arrived against what shipped before you even open the container.
Where this leaves you
Seven stages, seven places quality is either engineered in or left to luck. A supplier who can walk each stage with real records — material certs, weld logs, functional test sheets — sits in a completely different risk tier from one leaning on a final visual check. Ask to see the records, not just the showroom.
We're happy to send our stage-by-stage QC documentation and a factory video. Email [email protected] or WhatsApp +86-18158255610 and tell us which stage you care about most.
Article 3 of 10 · Zoye Patio B2B Sourcing Series
Ningbo Zoye Patio Technology Co., LTD specializes in premium garden shade and lighting products. From durable umbrellas and retractable awnings to elegant solar and LED lights, we create functional and stylish outdoor spaces that enhance comfort and beauty day and night.
1807 18th Floor, Lippo Centre Tower 1, 89 Queensway, Admiralty, Hong Kong
Copyright © 2026 Ningbo Zoye Patio Technology Co., LTD. All rights reserved. Privacy Policy
 EN
EN